A Beginners Guide: How To Create A Pinterest Page For Your Business
So, like many other marketers and directors you have decided to incorporate 'Pinterest' into your efforts to promote your products and services. The next question you’re asking is ‘HOW?’
The truth is Pinterest can seem daunting to inexperienced users and some of you may find yourself in a position where you just don’t have the time to learn how to use the site or you are put off by the technicality of starting your business Pinterest page.
In this 6-step guide you will see just how simple it can be to set up your business Pinterest page, leaving you with another form of communication with your customers and another way in which you can promote your products and services… FREE!
Step 1:
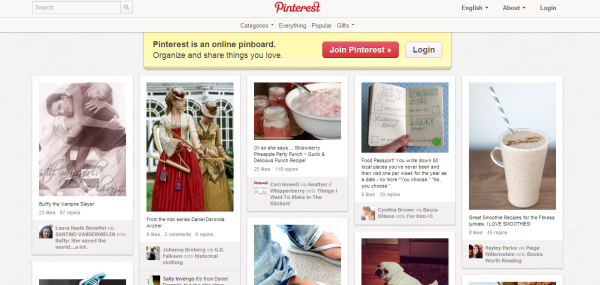
The first step is to put www.pinterest.com into your search bar at the top of your chosen web browser (Internet Explorer/Google Chrome etc.). Once there you should see this screen:
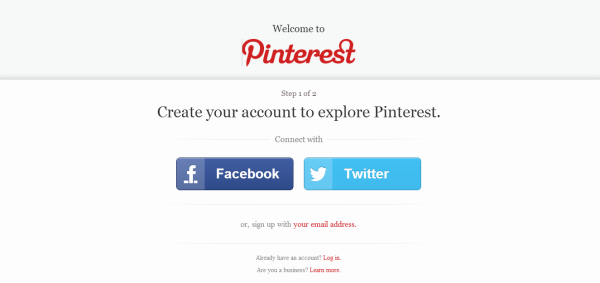
From here you have a few options; you can connect with Facebook or Twitter (which will connect all your friends on them sites to this site, giving you a head start in terms of contacts on your Pinterest page). You can also sign up using your email address in case you don’t have an account with these social media sites.
Step 3:
Once you have filled in the information about your business, it’s now time to create an account in which you set up your security details. These include your password, username and email address and some personal information such as your first name, surname and gender - you should see this page:
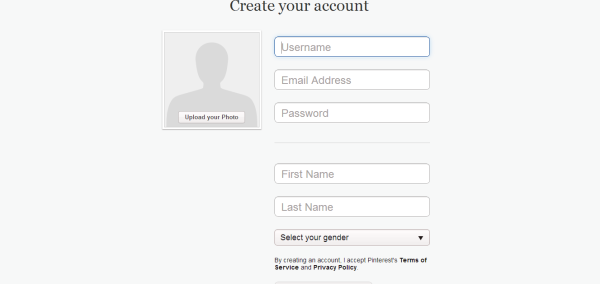
Agree the terms of policy and move onto the next step.
Step 4:
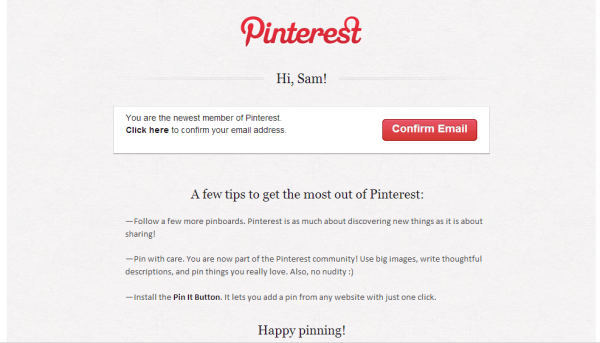
You will now have to confirm your email account. Pinterest will send you an email with a link attached - this is optional, however to access the full range of functions that Pinterest provides you will have to confirm your email address (to confirm it click the ‘Confirm Email’ in the red box on the right). The email will be sent to the email address that you used to create your account and will look something like this:
Step 5:
The next process is to start learning how to use Pinterest and its main functions. Your home screen will look something like this:
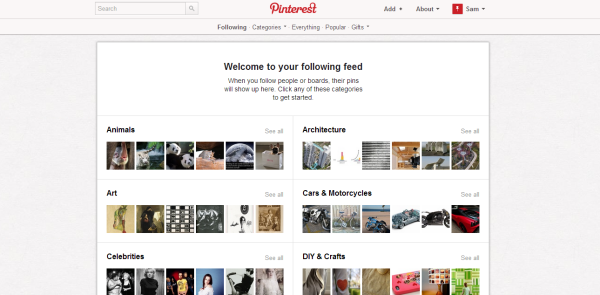
From here you can do access the main features of the site. In the top right hand corner you will be able to click a number of options, one of which you can access your account and change passwords, email addresses and other security features. This is much like Facebook - see our ‘A Beginners Guide: How To Create A Facebook Page For Your Business’ article for more information.
There is also an icon called ‘About’ - here you can access many help features and the terms and conditions of using the site among other things.
The icon ‘Add +’ brings this menu up:
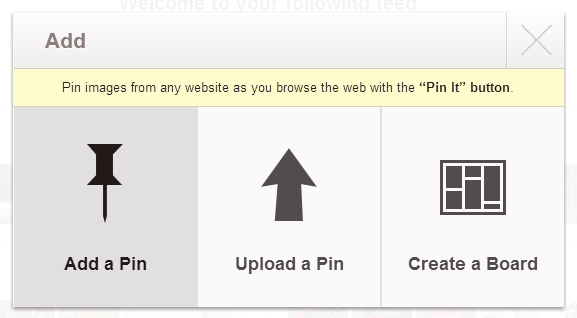
Clicking ‘Add a Pin’ will allow you to insert a URL of an image into your Pinterest profile (useful for uploading images from the internet). ‘Upload a Pin’ will allow you to upload images from your files (useful if they are personal pictures such as holiday or family images). The ‘Create a Board’ icon will allow you to create an album of images that will be shown on a board-like screen - you have to name your board and give it a category such as ‘Holidays and Events’.
This function also gives you the chance to allow friends and family to pin images onto it, all you have to do is insert their email address and they have permission to pin onto your board.
Step 6:
Pinterest also gives a 'follow' function in which you can follow your friends and see their boards, re-pin their images (much like the ‘Share’ function on Facebook and the ‘Re-tweet’ function on Twitter), like their ‘pins’ (much like Facebook with the ‘like’ function) and also comment on their images and boards which you find interesting.
With these six steps complete you are now ready to start using Pinterest to engage your customers and attract new business - use the comments to let me know how you get on!


